 |
|
Left soft button
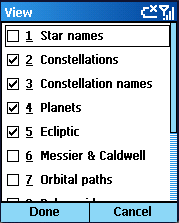
The Left soft button displays the "View" dialog.
Either scroll or use the number keys to choose which objects and overlays to display.
- 1 Star Names
- 2 Constellations
- 3 Constellation Names
- 4 Planet Names
- 5 Ecliptic The ecliptic is the great circle on the celestial sphere
that lies in the plane of the earth's orbit.
- 6 Messier Displays and hides the 110 Messier and 109 Caldwell deep
space objects.
- 7 Orbital Paths Displays and hides the paths for the inner solar
system bodies. The paths are draw for one year, centered on the current star chart
date.
- 8 Polar Grid. Displays and hides a grid through the north and south
celestial poles.
- 9 Zenith Grid. Displays and hides a grid centered on the zenith
point of the observer.
- 0 None. Hides all of the above objects.
- * Show Info. Show and hide information on the selected object.
- # Show Time. Show and hide the date and time.
|
 |
|
OK / Action
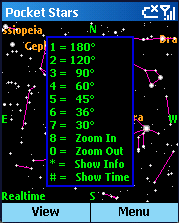
The OK/Action button shows the key menu and switches to full screen.
Click it again to hide the menu. Further clicks toggle between object selection
and scrolling modes.
Non-QWERTY devices can quickly change to various zoom factors by hitting a number
key to zoom smoothly in and out. The most important keys are:
8 Zoom In
0 Zoom Out
|
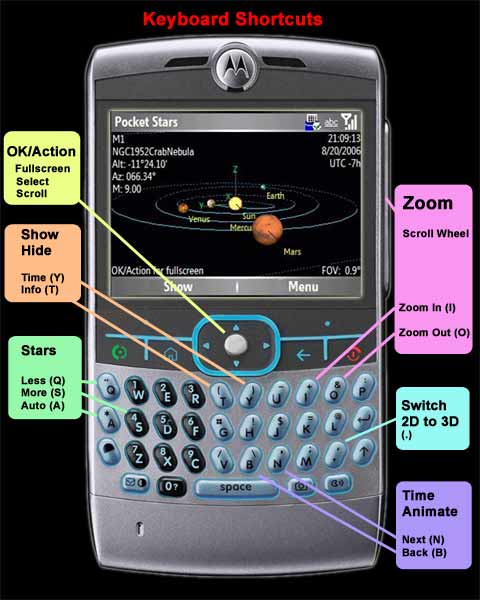
QWERTY Keyboards
QWERTY devices such as the Motorola Q shown below can use the following keyboard
shortcuts:
|
|
|
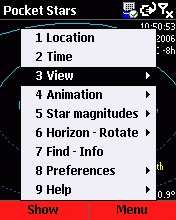
Main Menu
Activate the main menu by pressing the right soft button.
|
|
|
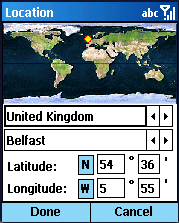
Location
Controls the zenith point used when drawing the star chart. You can either select
a city from the list or enter the latitude and longitude manually. The first entry
in the Cities list is "Custom" and is automatically selected if the latitude or
longitude fields are manually changed.
Areas of the earth currently experiencing night are shown in darker shades.
|
 |
|
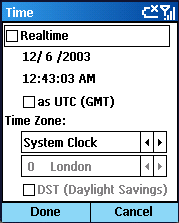
Time
Controls the time at which the star chart is valid above the selected Location.
Realtime. If checked, continuously update the star chart with the
current Smartphone time. If unchecked, you may specify a particular time using the
date and time fields.
UTC. If checked, the time selected is in Coordinated Universal
Time (UTC). Otherwise, time is entered as local time using the offset from UTC established
by the following fields.
Time Zone. Time Zone specifies the how local time differs from
UTC, expressed in hours. Each time zone covers 15° of longitude. Locations
west of Greenwich have negative offsets, while locations east of Greenwich have
positive offsets. The time zone may be set using three different methods:
System - Uses the time zone established by the device
clock. This is controlled by "Start.Settings.Date and Time".
Longitude - Uses the current geographical location (specified
in the Location page) to calculate Zone Time. While correct for many locations,
this method does not take into account the effect of political boundaries.
Custom - Enables a list box which you can use to set the
Time Zone.
DST. If checked, indicates Daylight Savings Time is in effect.
|
|
|
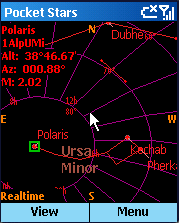
View, 2D - Star Chart
Displays a planisphere from any position on earth at any given time.
Press the OK/Action key to switch to full screen mode and display a list of keyboard
shortcuts. Press OK/Action again to hide the shortcut menu. Subsequent OK/Action
key presses toggle between "scrolling" mode and "selecting" mode.
The "." (period) key rapidly toggles between 2D and 3D modes.
|
|
|
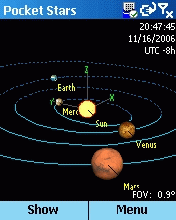
View, 3D - Orrery
Displays a view of the solar system from locations other than earth. Zoom moves
the viewing location toward and away from the sun. Scrolling rotates the viewing
location.
Press the OK/Action key to switch to full screen mode and display a list of keyboard
shortcuts. Press OK/Action again to hide the shortcut menu. "Selection" mode is
disabled in 3D view..
The "." (period) key rapidly toggles between 2D and 3D modes.
|
|
|
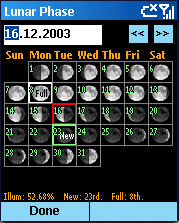
View, Lunar Phase
Displays the phases of the moon for a selected month. The full, new, (and blue if
available) dates are shown.
Illumination percentage for the selected date is shown at the bottom of the dialog.
Use the left and right arrows to increment and decrement by one day.
|
|
|
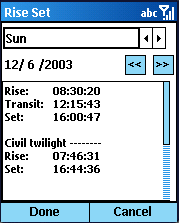
View, Rise and Set
Displays the rise, transit, and set times for all solar system bodies.
When the Sun is selected civil, nautical, and astronomical twilight is also shown.
Use the left and right arrows to increment and decrement by one day.
|

|
|
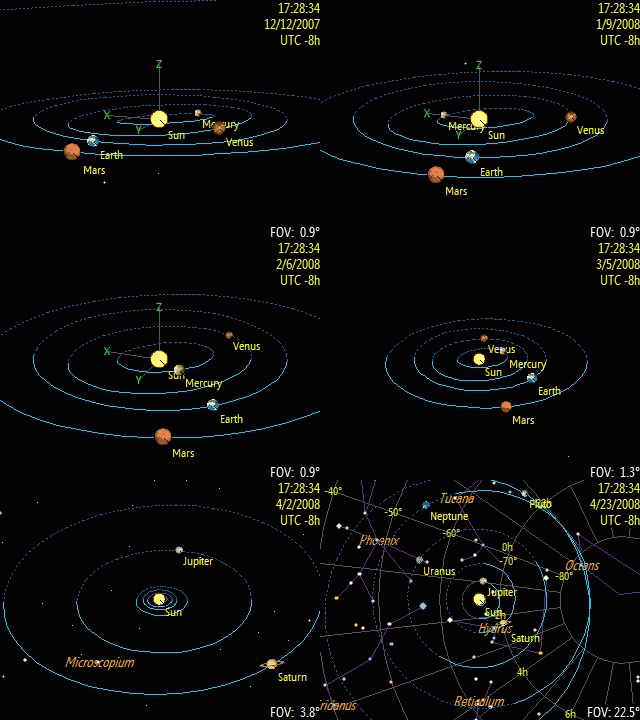
Animation
Let's you step forward and backward in time.
First select the unit of time by which you wish to increment and decrement. Then
select "Step +" or "Step -" to move forward or backward by that unit.
This is especially effective in 3D Orrery mode to note the relative planetary positions
over time.
|
 |
|
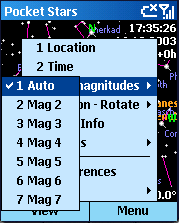
Star Magnitudes
Controls the minimum brightness of stars displayed on the chart.
Auto reduces screen clutter by automatically adjusting the number
of stars displayed appropriate to the zoom setting. Otherwise, the number of stars
displayed depends on the magnitude selected:
|
Magnitude |
Number of Stars |
|
0 |
4 |
|
1 |
15 |
|
2 |
48 |
|
3 |
170 |
|
4 |
513 |
|
5 |
1604 |
|
6 |
5023 |
|
7 |
9046 |
|
8 |
9096 |
|
 |
|
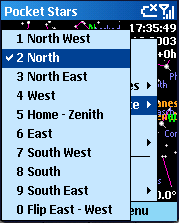
Horizon - Rotate
Positions any of the 8 compass points at the top of the chart. Also allows reversal
of east and west.
Home - Zenith Remove all scrolling effects so that the stars directly
overhead are positioned at the center of the display. Zoom factor is set to 1.5.
Note that a green X marks the zenith point directly overhead.
Flip East and West. If checked, the star chart is flipped along
the North - South axis. Leave this option unchecked if viewing the computer display
in-line with the sky. For example, leave this option unchecked if lying on your
back with the screen overhead. If checked, the display is mirrored along the North
- South axis, switching the positions of East and West.
|
|
|
Find - Info
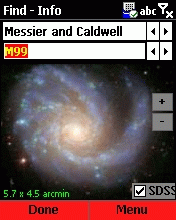
Used to select a star, planet, sun, moon, constellation, or Messier and Caldwell
object. The selected object will be centered on the star chart if currently visible
and Done is chosen. An image of the object is displayed if available. Choose "Info"
to show a text description of the object.
Messier and Caldwell images can be downloaded automatically if you have an internet
connection to your Smartphone (either phone network or ActiveSync). If not, you
can download the images files manually from this page. Select the ARM processor.
Checking the "SDSS" displays images from the Sloan Digital Sky Survey if you have
an internet connection. You can zoom in and out using the "+" and "-" buttons. Note
that SDSS does not cover the entire sky: most objects in the range M80 to M100 are
within the survey.
|
 |
|
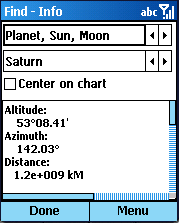
The "Info" menu choice switches to a detailed listing of measured and calculated
values pertaining to the body. |
 |
|
Preferences, Star Chart
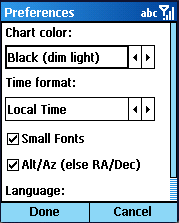
Controls display options for the primary star chart.
Star chart color
- Black (best in dim ambient light). If checked, the star chart background
is black.
- White (best in bright ambient light). If checked, the star chart
background color is white.
- Red (preserve night vision). If checked, the display colors are
changed to shades of red to cause minimal loss of night vision.
Star chart Time format Controls how time is displayed in the upper
right corner of the star chart. Use the "#" key to toggle display
of time.
- Local Time. The full time and date will be displayed.
- Local Sidereal Time. The abbreviation "LST" will appear under the
time.
- UTC. The abbreviation UTC will appear under the time.
- Greenwich Mean Sidereal Time. The abbreviation "GMST" will appear
under the time.
Small Fonts. If checked, a smaller font is used for displaying
information on the star chart.
Alt/Az (else RA/DEC). If checked, Altitude and Azimuth are displayed
on the main star chart. Otherwise, right ascension (RA) and declination (Dec) are
displayed.
|
 |
|
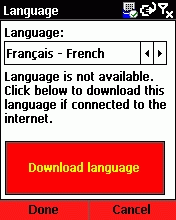
Preferences, Language
Pocket Stars SP is being localized into a number of languages. If a given language
has been downloaded or pre-installed, it is immediately available for selection.
You can dynamically switch between installed languages without restarting the program.
To download additional languages, press the "Download language" button if connected
to the internet.
A few features (such as display of the date and time in a format appropriate for
a given location) will not be available until you also change the location at Start.Settings.RegionalSettings.
|
 |
|
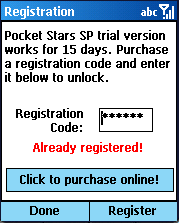
Help, Registration
Displays a dialog to enter the Registered Name and Registration Code. This permanently
unlocks demo version and converts it to the full version.
If you have an internet connection, press the "Click to purchase online" to visit
a website to purchase a registration code.
If you are having problems with the registration process, please visit this page.
|
 |
|
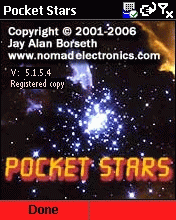
Help, About
Displays the version number of Pocket Stars.
|
Additional hints
- A Green X is used to mark the zenith point directly overhead.
- Use the * or "T" to show and hide the name, identifier, coordinates,
and magnitude of the selected object in the upper left corner.
- Use the # or "Y" to show and hide the star chart time in the upper
right corner.
- You can edit the file \My Documents\Pocket Stars\PocketStars.txt to change a variety
of default settings including colors for all of the star chart elements.
|